
How to Make Your Own Baby Food and Puree Pouches without Losing Your Mind… or Your Life’s Savings
When I found out I was pregnant with my first daughter just before Christmas 2016, I made a promise to myself that I was going to be the perfect mother: no expense would be withheld, or effort wasted on ensuring my future progeny would have the healthiest upbringing possible. I read every book I could get my hands on to ensure this all-important goal, and it soon became abundantly apparent that the core of any new baby’s health was in how he or she was fed. It seems such a simple concept, really, yet so much energy is devoted to exactly how this should be accomplished properly. There were opinions from every angle, and I was shocked by how militant various sources could be on what was “healthy” and what was “not”. Who knew that there was so much to be cautious of?!
After months of careful researching, I decided on the feeding methods that would be best for the new life we were bringing into the world that August. Not only would I ensure she was EXCLUSIVELY breast fed (I vowed no formula would touch her precious lips!!!), but also that everything I put into her little mouth when she transitioned from breast milk to solid foods would be organic, farm-raised, grass-fed, free range, ethically sourced, pesticide free, anti-inflammtory, non-hormone disrupting, and non-GMO. It is made her poop smell like roses and added sparkles to her eyes, all the better. I had a litany of vital criteria that I ensured my husband understood were non-negotiable. Nothing but the best!!!! And then my daughter Brynna was born and reality hit….
It didn’t take me long to realize that not only was this a monumentally difficult task to ensure each of my stipulations was met, but incredibly expensive as well Despite careful planning, my intentions went out the window with the bathwater. Having an auto-immune disease made exclusive breast feeding a medical difficulty, and I nearly drove myself into the ground with daily power-pumping sessions, round the clock pumping every three hours regardless of my daughter’s feeding schedule, and every milk-encouraging supplement I could order from Amazon. By the time Brynna was old enough to start experimenting with purees, I was exhausted and overwhelmed.
My criteria now seemed rather silly compared to just ensuring that baby was fed. Who the hell cared how?! The cost of organic food was through the roof, and there was no way we could afford the high-end pre-made concoctions the celebrities were feeding their kiddos. In addition, I started to hear about how many of the organic brands were having issues with heavy metals, and the thought of exposing our daughter to that was more terrifying than a non-GMO carrot puree. If I could find something that matched my needs and didn’t break the bank, it wasn’t readily available in our small town. What was a new mom with the best of intentions, but limited wallet and dwindling energy, to do?!
The reality of trying to provide quality baby food that met all my criteria was cost prohibitive and not easily accessible.
By the time my oldest was three months, I was lamenting my dilemma. All the baby books said that I should be introducing basic cereal around 4 months, and then slowly adding in fruit and veggie purees around six months. How in the hell was I going to accomplish this important series of milestones if I didn’t know where to start? Admittedly, I was putting an exorbitant amount of pressure on myself back then, and I chuckle a little when I think about it now. At the time, I hadn’t learned to “do my best” as most moms will happily come to discover by kid #2. I was back to work full time and needed a simple process to get healthy, quality purees into my eager baby’s mouth without breaking the bank or causing me to lose my sanity. Enter the Squeeze Station….
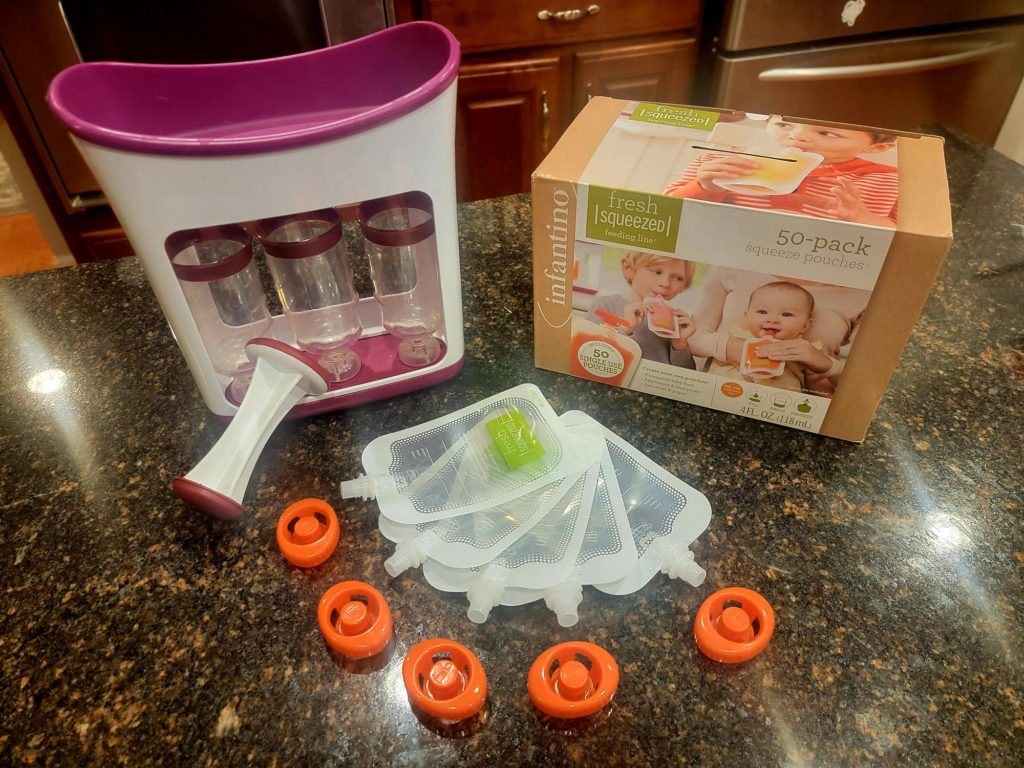
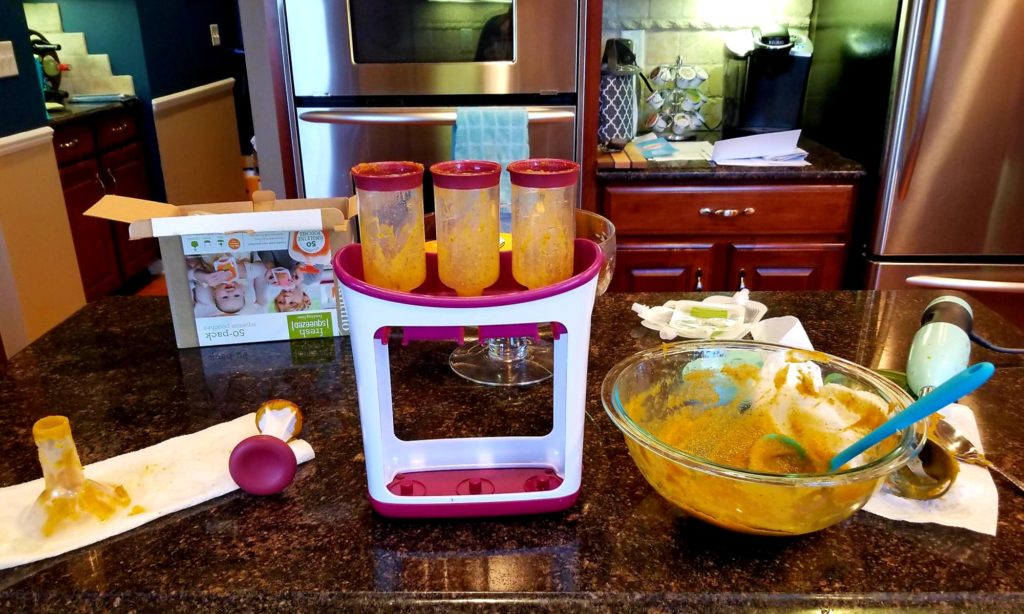
One of my best friends gifted me with the Infantino Squeeze Station as a baby shower gift. This nifty little gadget fills three puree pouches at a time, and enables large batches of custom baby purees a viable reality from right in your kitchen. In addition, a variety of pouch brands fit the Squeeze Station, so you aren’t limited to brand availability. The pouches even have screw on spoons for easy travel.
So now that I had the tool, where to begin? I couldn’t very well start feeding my baby 4oz pouches of puree mixes until I knew what she liked. Much of what I had read indicated to introduce one puree at a time in small batches, so that baby could experiment with different flavors and we could make sure we weren’t giving her something that would cause an allergic reaction. All suggestions were for 1oz servings.
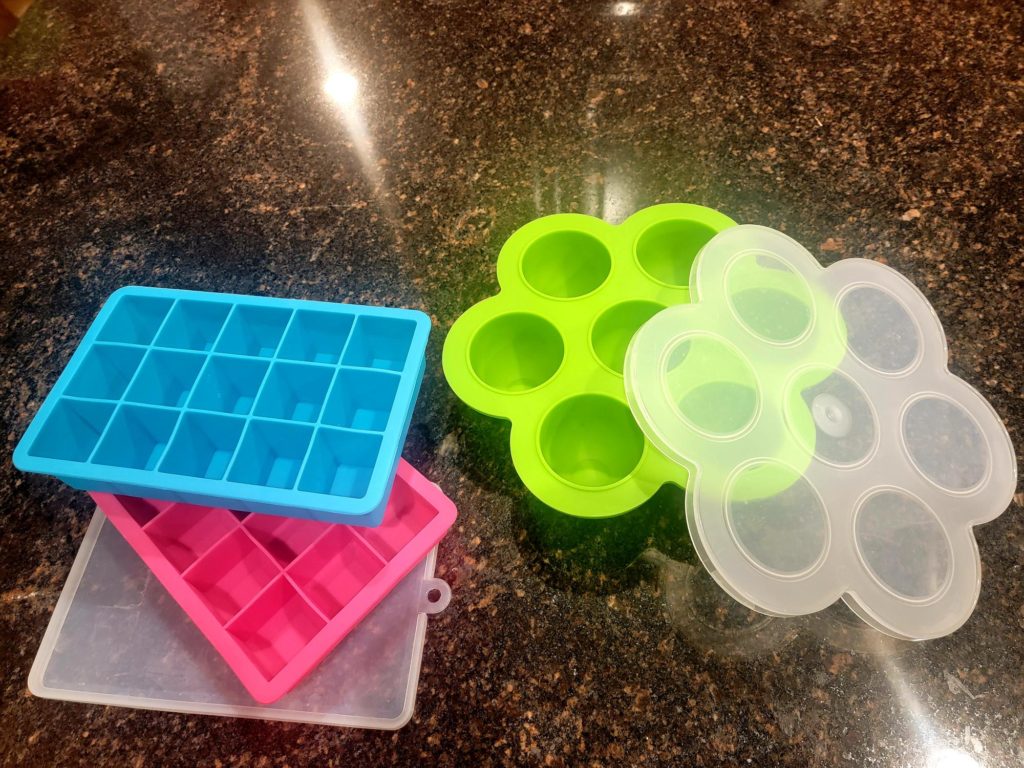
After a quick Google Search, I discovered silicone ice cube molds on Amazon that were… you guessed it…. 1 oz in size and square-shaped. I could make and freeze various purees in convenient 1 oz cubes, that made for easy thawing and stacked flawlessly in freezer bags. Alternatively, I could leave them in the mold for on demand use. Each mold had fifteen 1 oz compartments, was dishwasher safe, and came with a sturdy lid. Now I just needed to figure out WHAT to make and HOW to make it. I purchased a few baby food recipe books and explored several online blogs from fierce mommas who had the DIY puree game down pat.
It took me only a few tries to get in the groove, and now four years and three kids later, I have a fail-safe process that yields months’ worth of baby food in a just a few hours. Keep reading for step-by-step directions, and delicious baby puree combination ideas!
Equipment
It’s very important to have the right equipment in order to make the process as simple as possible. I recommend the following tools:
- 3-4 silicone one ounce ice cube trays (food grade and dishwasher safe, preferably with lids)
- Instant Pot (or stove top pot with lid and steamer basket)
- Immersion blender or high-powered blender like Ninja
- Small ladle and a wide mouth funnel, or turkey baster
- Sharp chopping knife
- Potato peeler
- Apple slicer (the kind that cores your apple and cuts into slices at the same time)
- Infantino Squeeze Station or equivalent pouch filling tool
- 20-25 pouches with twist tops
Prepare
Before you blend up your first concoction, you’re going to need to do a little preparation to ensure efficiency and variety. This is often the hardest part, as it can be tempting to make ALL the food. If you are going to be trying purees for the first time with your kiddo, I recommend planning on making a few trays of 1 oz cubes with 3-4 different fruit and veggie purees, and then using these same purees in various combinations to fill pouches. Some fairly common purees to try are apple, sweet potato, banana, and avocado. They are perfect first foods to try alone, and also mix well together for yummy combinations your kiddo will love. I recommend the following shopping list:
- 3 lb bag of sweet apples such as Gala or Pink Lady varietals
- 3 lb sweet potatoes
- 8 avocados
- 2-3 bunches ripe bananas (green bananas don’t puree well so the more ripe the better)
Cook
Once you have your equipment and groceries, it’s time to get cooking! Two of the above ingredients require a little more work than the others by peeling and cooking, while others just need a quick prep and then blend. Start with the hardest ones first and then work your way to the easiest. Trust me, this will keep you motivated start to finish. I’ve assumed you will be using an Instant Pot as this is the fastest and most efficient way to make a whole bunch of purees in a short amount of time. Alternatively, you can use a large pot and steamer basket, but this will require a lot more time and patience. If you haven’t invested in an Instant Pot or pressure cooker, I can’t stress enough the value of this amazing kitchen appliance in your household. Baby food is just one of its many benefits! Lastly, use the water you’ve cooked your fruits and veggies in to help ensure a smooth puree. I’ve provided a suggested timeline below that maximizes downtime during cooking to work on other ingredients.
Sweet Potato
- Peel potatoes and quarter.
- Add to Instant Pot with 1 cup water.
- Cook on high pressure for 10 minutes. Quick release pressure.
- Use immersion blender to blend with water already in Instant Pot insert, or alternatively move to regular blender and add cooking water. Blend until very smooth.
- Fill one ice cube tray with puree. Put remainder in a bowl and set aside.
Apple
- Peel apples while potatoes are cooking.
- Using apple slicer tool, slice and discard cores.
- Add slices to Instant Pot with 1 cup water.
- Cook on high pressure for 10 minutes. Quick release pressure.
- Use immersion blender to blend with water already in Instant Pot insert, or alternatively move to regular blender and add cooking water. Blend until very smooth.
- Fill second ice cube tray. Put remainder in another bowl and set aside.
Banana
- While apples are cooking in Instant Pot, peel bananas and remove all stringy bits.
- Cut into chunks.
- Blend with 1 cup hot water until very smooth.
- Fill third ice cube tray. Put remainder in a third bowl or container and set aside.
Avocado
- Halve avocados and remove pits. Spoon out flesh and discard peels.
- Cut into chunks.
- Blend with 1 cup hot water until very smooth.
- Fill fourth ice cube tray. Put remainder in a fourth bowl or container and set aside.
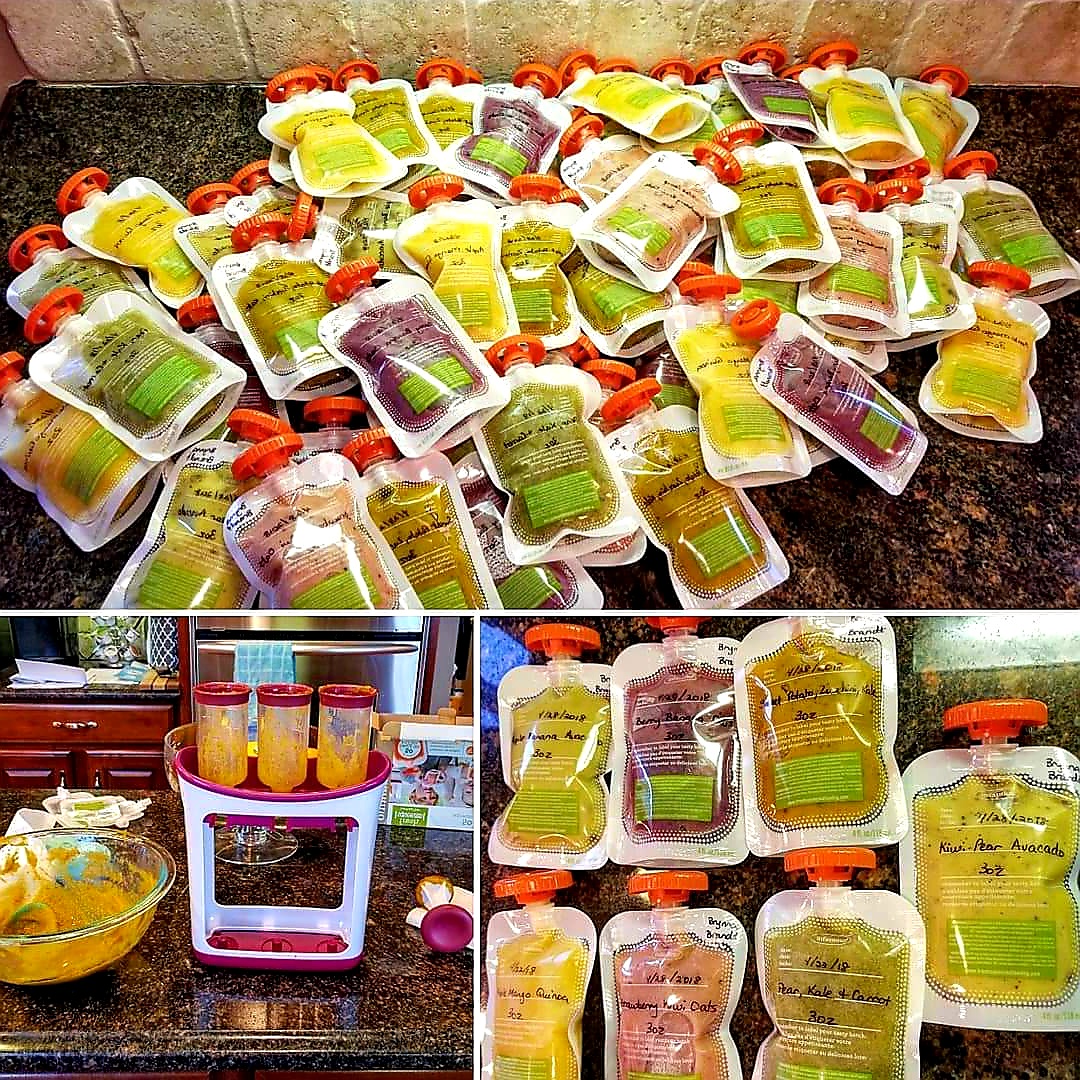
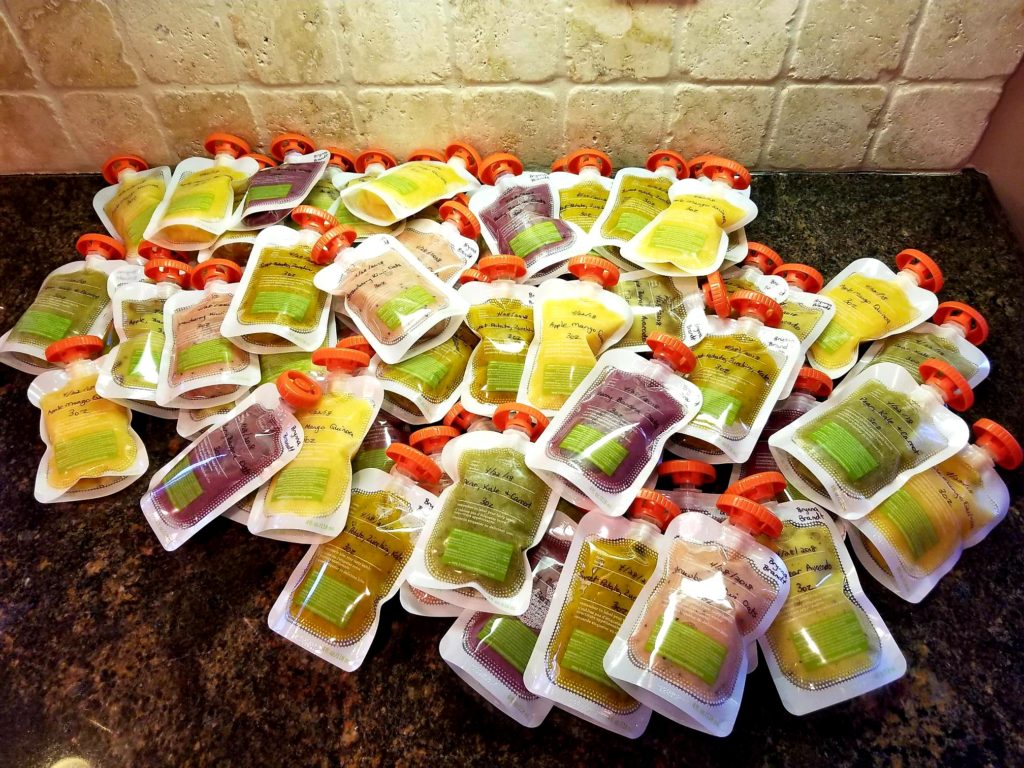
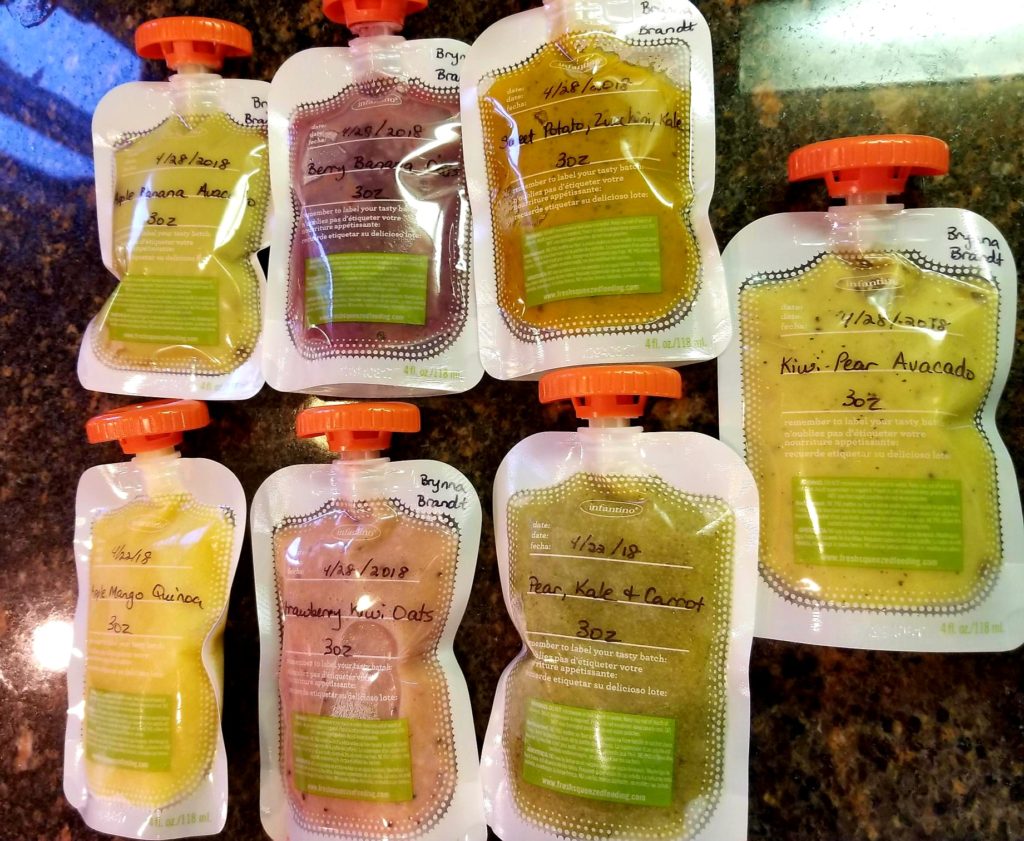
Once you have your 1 oz trays filled, now you can mix and match each of the purees into various combinations. Any combination you can think of for the above four ingredients works well. Fill your pouches with various blends, label your pouch, and freeze for later use. These thaw magnificently in less than a minute in warm water when you’re ready to use them later.
Once you have your initial batch of 1 oz cube and puree pouches, you’re going to be hooked! Plan a couple of weekend cooking sessions where you pick three to four ingredients, create cubes, and then make various combinations into pouches. Within a few short weeks, you’ll have months of homemade purees you can feel good about and your baby will love!
Here’s another great tip: after a few months, your baby will graduate from1 oz portions, to 2-4 oz. You can mix and match the cubes to make unique and engaging puree combinations that thaw in 30 seconds in the microwave.
When deciding on flavor combinations, don’t be afraid to buy frozen, canned, or tetra-packed goods. There are lots of organic options available, and canned/tetra-packed vegetables can be very cost effective. Studies show that certain fruit and veggies that are flash frozen often retain more nutrients. The convenience these processing methods pays you back in spades. I love frozen squash and tetra-backed black beans. If you are in warmer climates or during the spring/summer months, shop seasonal ingredients to not only maximize freshness, but to stretch your dollar further. Farmer’s markets and co-ops can also be a fabulous way to buy fresh ingredients in bulk.
When you are considering various combinations for your purees, there are a few basics to keep in mind. Try to pick vegetables and fruits that are modest in water content. For example, grapes and watermelon are mostly water and will yield extremely runny purees. In addition, be wary of textures. Kiwi seeds often don’t blend, so you can create a gritty puree that baby may not appreciate. Fruit skins can also yield a strange texture. Try to use a mixture of vegetables and fruit combinations to maximize nutrition and vitamin content. You can often disguise the less than preferred flavors of very important vegetable like spinach and broccoli with fruit and starch combinations. Experiment with plant based proteins and healthy fats, or be bold and mix in real meat and/or breastmilk or formula. The sky’s the limit when you are making your own amazing puree combinations. Be cognizant of the appropriate times to introduce various allergy inducing ingreditents (such as shellfish, peanuts, and strawberries) and always check with your pediatrician on the best time to start introducing your little one to these items. If you are feeling particulary epicurious, don’t hesitate to add herbs and seasonings to your purees. Expanding baby’s pallet from a young age could yield you an adventurous foodie in the future (or not… toddlers never seem to cooperate!)
Suggested Puree Combinations
- Black bean, sweet potato
- Black bean, corn, zucchini
- Blueberry, banana, avocado
- Zucchini, pear
- White bean, apple, broccoli
- Sweet potato, carrot
- Mango, apple, spinach
- Spinach, pear, blueberry
- White bean, butternut squash
- Butternut squash, spinach, zucchini
- Pear, kale, carrot
- Blueberry, banana, spinach


You May Also Like
Mom Hack Monday: Sleeping in Clothes

Mother’s Day Amethyst Mimosa